In this article, I propose a few solutions to the Ethernaut challenge : https://ethernaut.openzeppelin.com/. I will release more solutions progressively
It is an initiative from OpenZeppelin, which is a well known library for secure smart contract development. It proposes Ethereum based, open source challenges, written by several contributors
There are already several solutions available. My goal in this article is to provide a step by step walkthrough, that should help the most beginners among us. Please note that I have done the challenge using Google Chrome
Before starting, it is usefull to have an overview about the Web3 process, in comparison to the usual Web2, as it will help understand why we use Javascript, Metamask, Solidity and other such features

Level 0 : Hello Ethernaut
In this chapter, which is an introduction, we will set up MetaMask, get test Ether, and start our first interactions with the smart contract
Set up MetaMask
First of all, we need to install the Metamask browser extension : https://metamask.io/, and then create a password and a wallet key. We need to select the Sepolia test network, which we will use for our hacking scenarios

Open the browser’s console
The modern browsers provide hands-on tools for the web developers, such as the console, in which one can input “live” Javascript instructions, check the data in memory, explore available functions and variables
In the Ethernaut browser session, let’s go in Tools -> Developer tools (or just press F12). In the console view, we find the following informations

You may get some errors, so please make sure to solve them before continuing. If needed, you may check the following actions :
- use Chrome
- install Metamask after you reached the challenge page
- select the Sepolia test network
- refresh the page as per the need
We get an Ethernaut address : 0xa3e7317E591D5A0F1c605be1b3aC4D2ae56104d6
My player number is : 0xe62f9927b2198669b5988993E52d3093854898b0. In fact, this is my Metamask public address
You can check mine here in Etherscan, the well known ethereum blockchain explorer : https://bit.ly/3aP37JO. It corresponds, in my specific case, to the Ethereum Name Service “forensicxs.eth”
Level 0 : Hello Ethernaut
We click on the level “00” box

Use the console helpers
We are invited to type the help() command in the console. Here is the output :

We can check the balance of our account, with the function getBalance(address). We need to input our actual address

We see that the “Promise” has been fulfilled, and that our balance is at zero, as expected. You can find informations about Promises here : https://javascript.info/promise-basics
The ethernaut contract
Let’s look into the smart contrat. The ethernaut command provides a lot of informations about the contract itself

We can see the public methods available, such as owner
We can see that the smart contract has an abi connector at the following address : 0xa3e7317E591D5A0F1c605be1b3aC4D2ae56104d6
The abi, or Application Binary Interface, gives a contract the ability to communicate and interact with external applications and other smart contracts. Here is the overall mechanism

Here we are more interested in reading contracts FROM the Ethereum blockchain, but you can check the following link to get an overview how to deploy a contrat TO the blockchain : https://bit.ly/3OlkD5V
If we try to check the ethernaut owner, the query to the blockchain will need some gas to be able to run. In my case, the Metamask wallet balance is not sufficient, so I get an error message

Get test ether
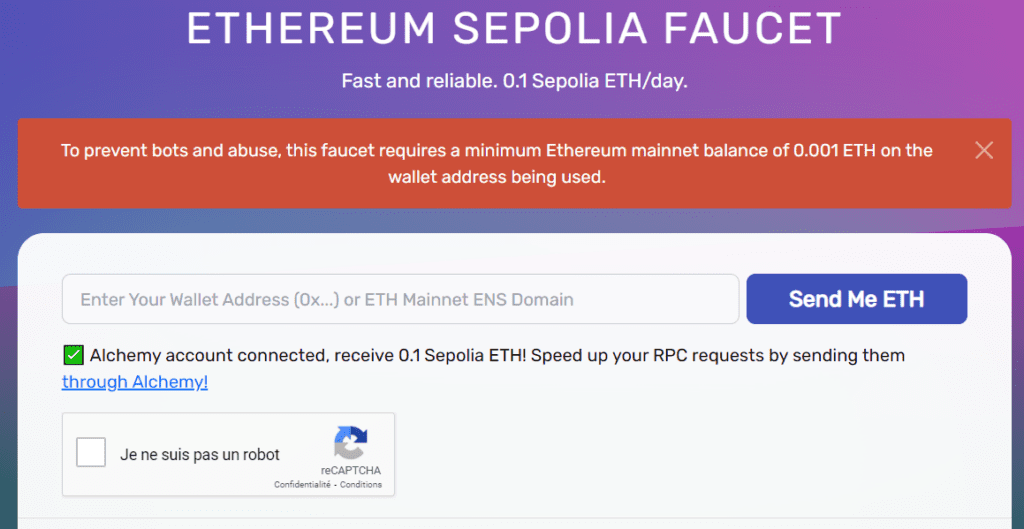
You can request test Ether with a Google account : https://tinyurl.com/5xe8r23z

This method is limited to 0.05 ETH per day, so it’s not quite enough to get started with the Ethernaut challenge
You can get more token on Alchemy (requires a login and a small amount of real ETH on your metamask wallet)
Getting a level instance
As indicated by the guide, let’s request our level instance, by pressing the “Get new instance” button. We are prompted by Metamask to authorize the transaction. In my case, the gas fee to pay is 0.0228 Sepolia ETH (= test ETH)

The transaction is duly handled, and my instance is created, with a smart contract at the address 0x3A99561FA3026041B8647bdae4E7339c2Ebc45E9

Inspecting the contract
Let’s inspect briefly this contract instanciation, using the contract command

We have access to several public functions, including several ones that look interesting : info, info1, info2, info42, password. Let’s try to find additional informations about these functions
Interact with the contract to complete the level
In this paragraph, we take advantage of Solidity being an OOP language (object oriented programming), so that we can get informations about the functions by calling them, with their respective methods and arguments
Let’s run the contract.info() command. We find a valuable text information “You will find what you need in info()”

We continue with the contract.info1() command. We find another text information “Try info2(), but with \”hello\” as a parameter.”

Therefore, we continue with the contract.info2(“hello”) command.

You get the idea. We have to follow a chain of information…let’s continue with the infoNum() method. We see in the PromiseResult, the word 42

Let’s look for contract.info42()

We have to look for “theMethodeName” as a method

Let’s look into contract.method7123949

We are invited to find the password. We have noticed the function “password” in the contract. Let’s check it in contract.password()

We get the password “ethernaut0“. Now, we can authenticate. We are prompted to accept the transaction by Metamask, a gas fee of 0.023 Sepolia ETH is applied

The transaction is successfull, we can check it on Etherscan

To complete the level, you need to press “submit instance“. Metamask prompts you to accept again the transaction as the blockchain consumes gas for any request

Our transaction is approved, we get a very graphic confirmation 🙂
We get a notification on the Ethernaut website

Just below, OpenZeppelin provides the contract code we just interacted with, where we can confirm the steps and logic we just followed above

This level is finished, let’s move to the next one
From now on, we will come closer to a realistic hacking environment
Level 1 : Fallback
We are requested to inpect a smart contract code (here below), take ownership of it, and withdraw the available balance

In Solidity, a fallback function does not take arguments and does not return any value. But a fallback function can receive ether and therefore be “payable”
Let’s get the instance of the contract by clicking “Get new instance”. We need to pay some gas

Our instance address is 0xB386A21D3aAe67a9dAe0144aF2226b86c8EB6960

We can analyse the contract code. The first flaw is in this code, as anyone can :
- call this function
- send Ether
- if the contribution gets higher than the one of the contract owner, take ownership of the contract

Then, the “owner” can withdraw the funds

Therefore, the fallback contract allows users to contribute small amounts of Ether, and the maximum contributor becomes the owner of the contract
But to take ownership of the contract, you would need to get more than 1000 ETH, as per the constructor, because the owner has an initial contribution of 1000 ETH

Fortunately for us, there is a second flaw to take ownership of the contract, whereby any sender can become the owner if :
- he sends a positive value of Ether (msg.value > 0)
- he has already contributed (contributions[msg.sender] > 0)

We can deposit Ether on the contract by using the necessary arguments of the function contract.contribute()
We have to deposit less than 0.001 ETH, so we can choose 0.0009 ETH, just a decimal below. The help() function provides us some guidance about the method to use, to send our transaction to the contract

We also need to send our transaction in Wei (see here a converter, for information -> https://eth-converter.com/), as generally required by smart contracts

So in summary, the arguments to provide to the contract.contribute() function are :
- from : our address is given automatically by our player address
- value : the value of our deposit in Wei
Here is the full transaction. It gets fullfilled, after we paid some smart contract gas fee

We can check our ether balance with the function getBalance

Then, as we have already contributed to the contract, we can take ownership by sending a positive deposit

We can check the contract owner. This is my player address, so I have claimed ownership

Then we can drain the funds with the function contract.withdraw()
We need to press the “submit instance” button to validate this level. We get to this screen, we can press the “Go to the next level” button

Level 2 : Fallout
The full smart contract code is below

To start with a quick analysis, I notice that the contract owner has a null value, which is the default address

At the same time, this address has a huge amount of ETH

I notice also a discrepancy between the contract name Fallout and the constructor Fal1out, which means that the owner is not initiated properly (leading to the owner being the null address)

So anyone can claim ownership of the contract. I just call the contract with contract.Fal1out() and here we go !

We can check that I’m now the contract owner. The Promise result confirms this is my player address

I submit the instance. Level is completed

Level 3 : Coin Flip
As per the description, this is a coin flipping game where we need to guess the outcome of a coin flip. To complete the level we need to guess the correct outcome 10 times in a row
The full code is provided here below

This code leverages the randomness of the blockchain’s state (specifically, the last block’s hash of Ethereum) to simulate a coin flip
By dividing a large pseudo-random value (the block hash) by a large constant and interpreting the outcome, the contract creates an unpredictable result for the two possible outcomes of a coin flip (true or false)

It is usefull to read this article about Ethereum, and get to understand block number, block hash : https://bit.ly/3U878Mu
In the code, blockhash is a global variable that takes block.number and returns the hash of the given block

block.number -1 returns the block number of the previous block, as the current block is not yet mined
On Ethereum, the block hash changes every 12 seconds or so, as shown on this chart
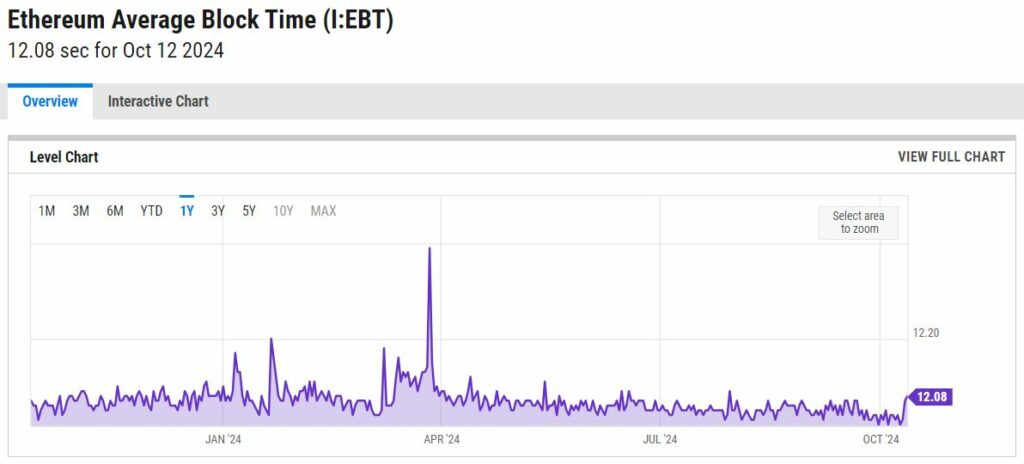
It means that within these 12 seconds, the blockhash will not change and the coinFlip will not be random at all. So we can somehow repeat the flip without any change to the result. However, there’s a protection against re-using the same blockhash several times, so we need to find another way

We need the consecutiveWins to reach 10. At the moment, it is stuck to zero

We can perform a Coin flip by first getting the contract address

Then we can flip the Coin, but it does not get fulfilled as the revert() function cancels it

We can use another contract to hack the CoinFlip code, that we are going to call HackCoinFlip
We can guess the calculation of the hash of the CoinFlip contract, to generate the random number that we know this function is using. We can “intercept” this result and pass it on to our HackCoinFlip contract. The code of this other contract is below

The contract calls the flip function of the CoinFlip contract with the calculated guess
The constructor initializes the coinFlipContract instance with the address of the deployed CoinFlip contract, to intercept the result
The CoinFlip contract’s outcome is determined by the block hash of the last block when it is mined. So, by accessing the same block hash used by the CoinFlip, the HackCoinFlip contract can precisely calculate what the coin flip result will be
Because the hash of the last block is used to generate the random outcome and is publicly available as part of the Ethereum blockchain, this contract can effectively “guess” the flip outcome before it happens
We need to deploy our code in our environnement. For that, we are going to use the Remix IDE : https://remix.ethereum.org/
In Remix, we need to copy the code of our two contracts : contract HackCoinFlip, contract CoinFlip
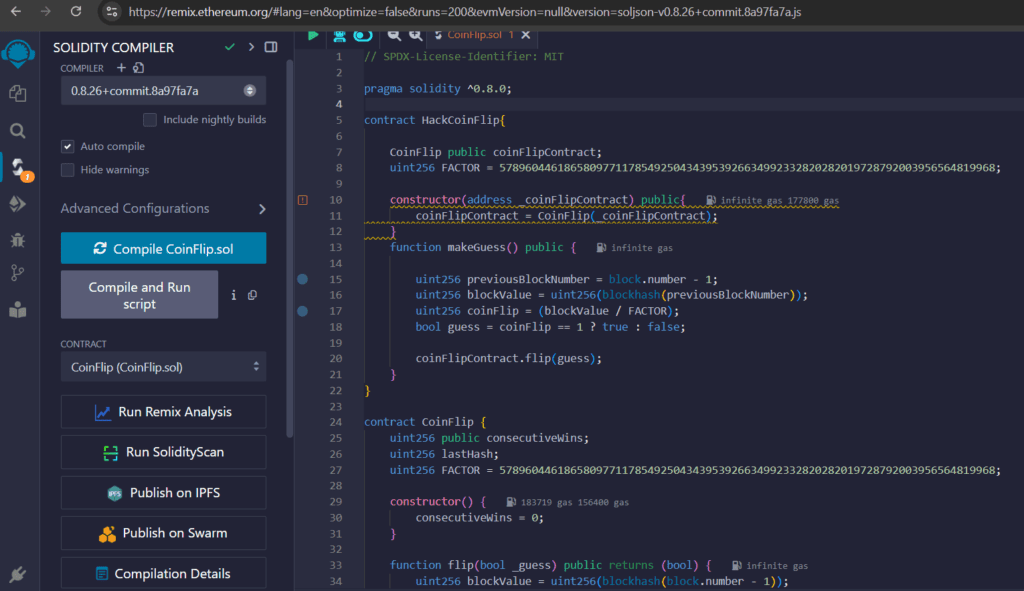
Then we can compile the code, correct any issues (with the help of the built-in AI)
Afterwards, we deploy the code by selecting the Metamask environnement and our instance adress 0x2B483868AD9862d8ab1EdE67BC2f3f4A4962C7f9
First, we deploy the HackCoinFlip contract

By pressing the Deploy button, we need to pay some gas in Metamask

Then we deploy the CoinFlip contract (we need to pay gas again)

Then we can use our contracts to “flip and guess”. At the beginning, ConsecutiveWins is set to zero

We need to execute makeGuess for 10 times, and check the consecutiveWins counter going to 10

Then we can press the Submit instance button, and we pass the level

Lessons learned : this example highlights the importance of proper random number generation within smart contracts, as relying on block hashes for randomness can be easily exploited. In production, developers should use reliable sources of randomness, such as Oracles or other decentralized solutions (like Chainlink VRF : https://chain.link/vrf)
