
In this article, I’m going to show you how to use Wireshark, the famous network packet sniffer, together with NetworkMiner, another very good tool, to perform some network forensics. You can easily download and install Wireshark here https://www.wireshark.org/download.html, on a Windows 10 machine for example, and NetworkMiner here https://weberblog.net/intro-to-networkminer/
I’m going to follow step by step a network forensics case, the Nitroba State University Harrassment Case. All the material is available here, published under the CC0 licence : https://digitalcorpora.org/corpora/scenarios/nitroba-university-harassment-scenario
This scenario includes two important documents
The first one is the presentation of the Case : http://downloads.digitalcorpora.org/corpora/network-packet-dumps/2008-nitroba/slides.ppt
The second one is the PCAP capture : http://downloads.digitalcorpora.org/corpora/network-packet-dumps/2008-nitroba/nitroba.pcap. Read below about PCAP

Let’s have a first look at the PCAP file
Just click on the PCAP file, and it should open in Wireshark. You get a first overview of the very long list of packets captured
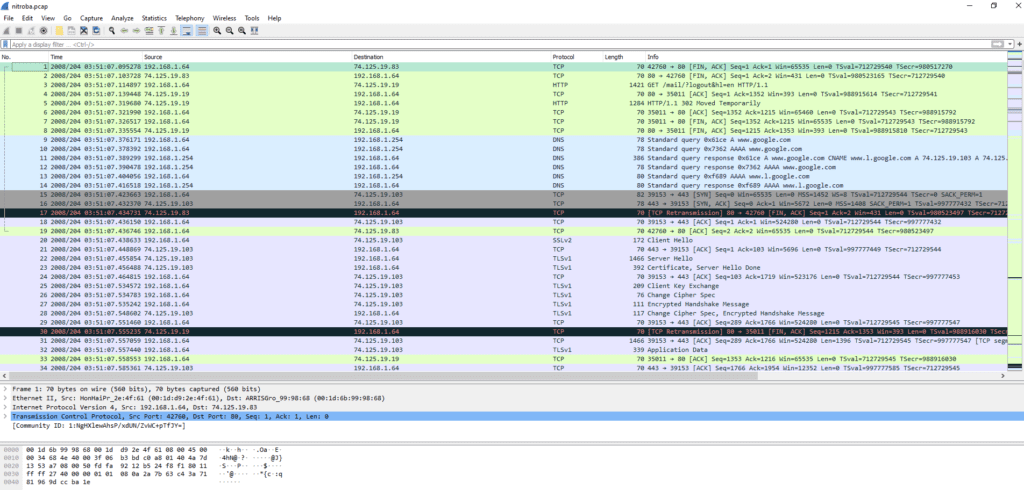
In the first section, you get the list of packets/frames ordered by number, time, source IP, destination IP, protocol, length, and informations about content
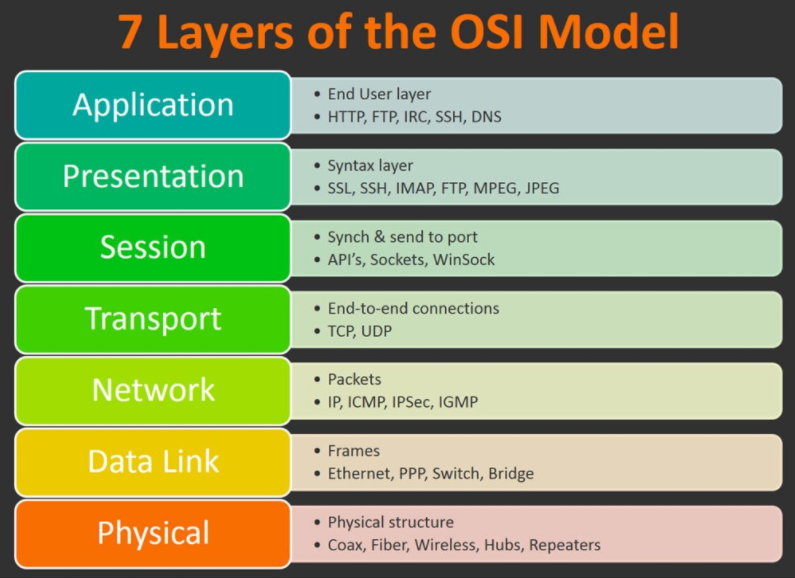
In the second section, you see the details of a packet (here packet/frame number 1), shown according to the main layers of the OSI model. For packet number 1, we have informations about the first four layers (respectively n°1 “wire”, n°2 “Ethernet”, n°3 “IP”, n°4 “TCP”)
In the third section, we have the details of the packet number 1 in HEX format. It is usefull to check the source data in a “compact” format (instead of binary which would be very long)
As a very first step, you can easily gather statistics about this capture, just using the statistics module of Wireshark : Statistics => Capture File Properties
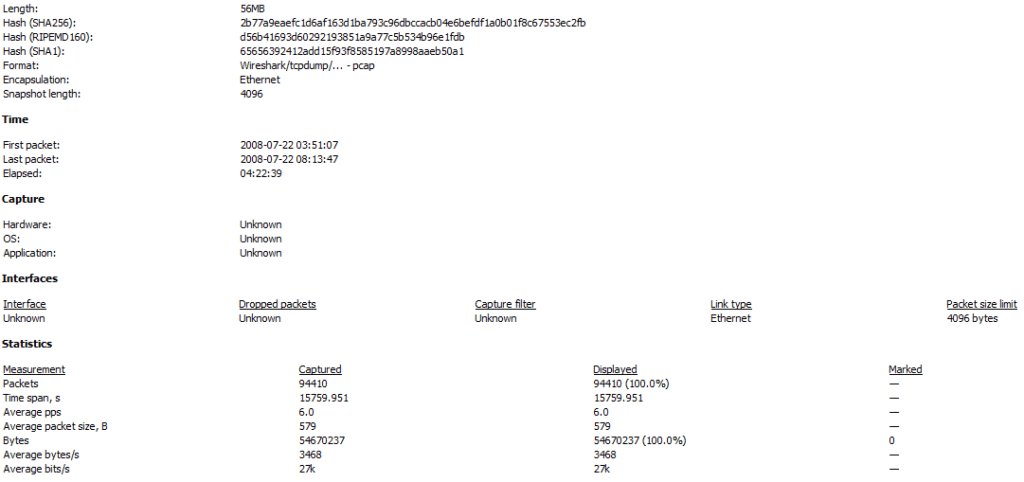
We can see that the SHA1 and SHA256 hash signatures match with the ones given in the scenario (as expected). We also see that the elapsed time of the capture was about 4 hours and 22 minutes. This is quite long, and explains the quantity of packets received in this network capture : 94 410 lines. No chance to read through each packet line by line…this is why a key concept in Wireshark is to make use of filters to narrow down any search made in the capture. As you can guess, we are going to use filters for our analysis…!
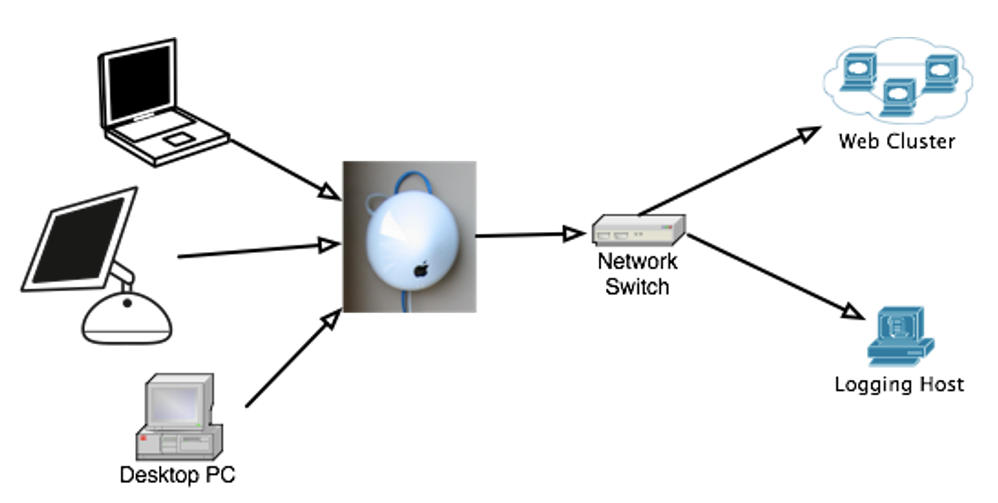
Map the Nitroba dorm room network
Now, read through the Powerpoint presentation to get an overview of the Case. There is one key information to start analyzing the PCAP capture

The IP was found in the email header
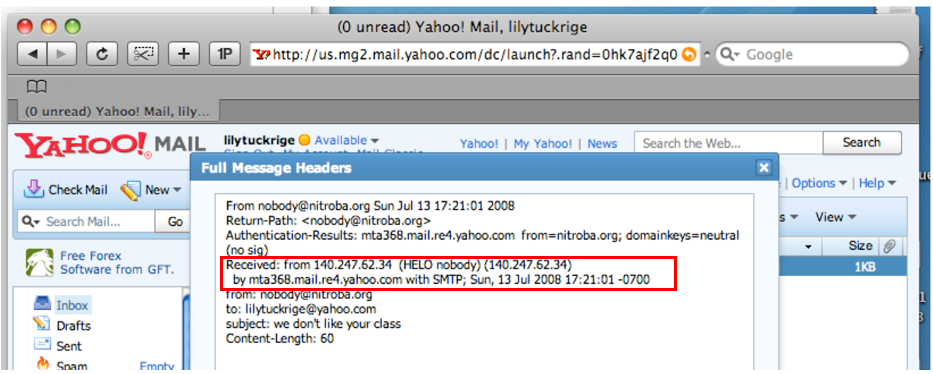
So, let’s filter the PCAP file using the IP adress used to send the first email : 140.247.62.34, both in the source and destination IP : ip.src==140.247.62.34 or ip.dst==140.247.62.34 (to learn the filtering by IP, check this : https://networkproguide.com/wireshark-filter-by-ip/)
We find that this IP has a low presence in the Wireshark statistics : 0.06% of the total sent packets (equal 52 packets)

Now, look closer at the IP adresses source and destination (here below a screenshot of the first packets)…you see that the IP 192.168.15.4 plays a central role as it is the only IP bridging with our IP 140.247.62.34
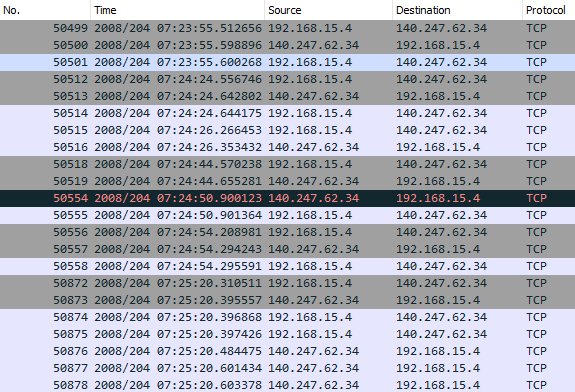
This type of IP is well known : it’s a private IP adress. See below some explanations


Let’s have a look in the OSI layer n°2 of a packet capture between these two IP adresses 192.168.15.4 (source) and IP 140.247.62.34 (destination). We find interesting informations about the hardware and MAC adress of the two physical devices pointed by these IP
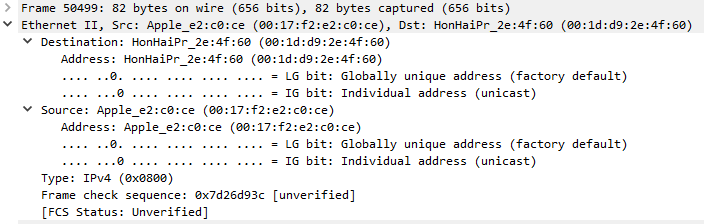
So, the information reads as follows
| IP | MAC | Hardware |
| 192.168.15.4 (source) | 00:17:f2:e2:c0:ce | Apple |
| 140.247.62.34 (destination) | 00:1f:d9:2e:4f:60 | HonHaiPr |
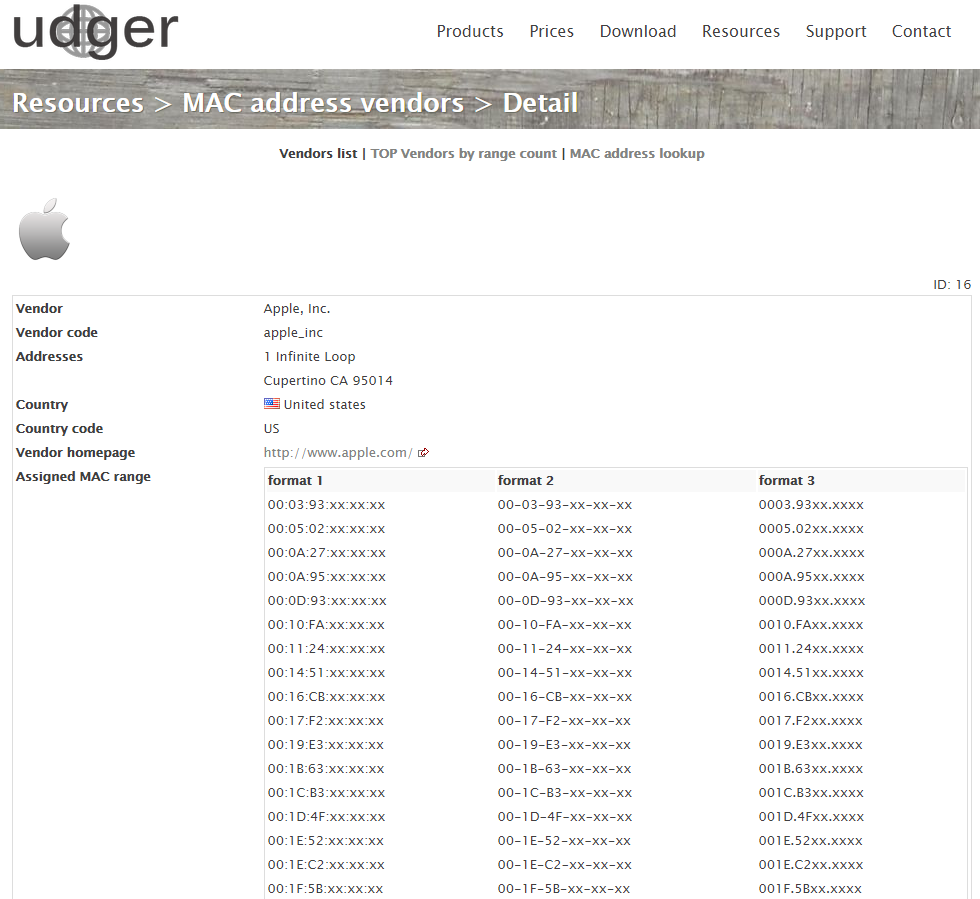
A Google check with the MAC 00:17:f2:e2:c0:ce confirms this is an Apple device
What is HonHaiPr ? A carefull Google search reveals it’s Hon Hai Precision Industry Co Ltd, also known as the electronics giant Foxconn

Find who sent email to lilytuckrige@yahoo.com and identify the TCP connections that include the hostile message
Let’s use again the filter capabilities of Wireshark : frame contains “tuckrige”
We find three packets . The first two of them are using the OSI model layer n°7, that is the application layer, represented by the HTTP protocol. The last one is using the OSI model layer n°4, in this case the TCP protocol
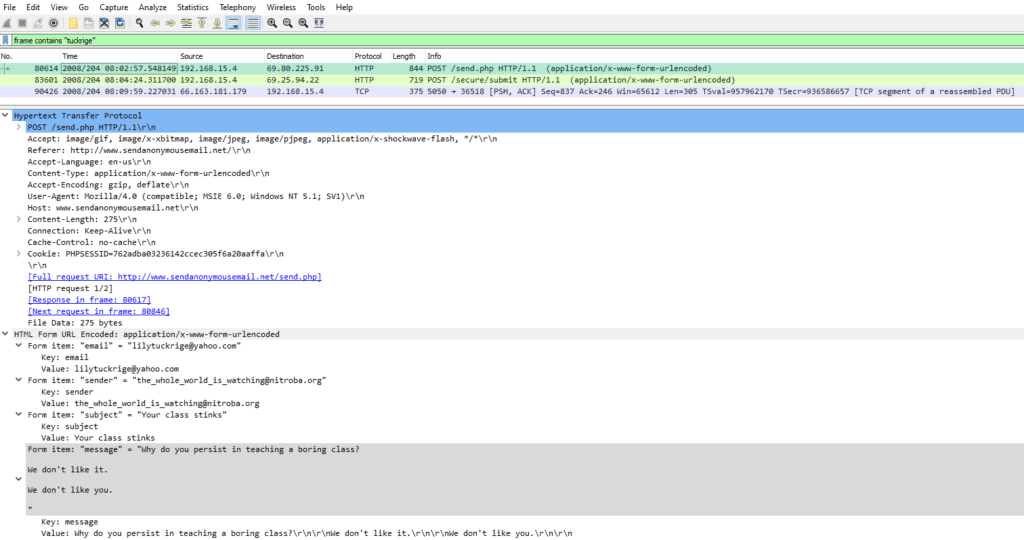
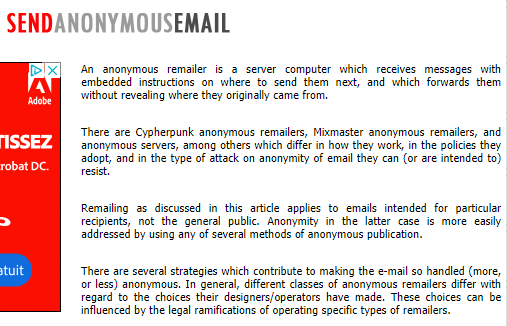
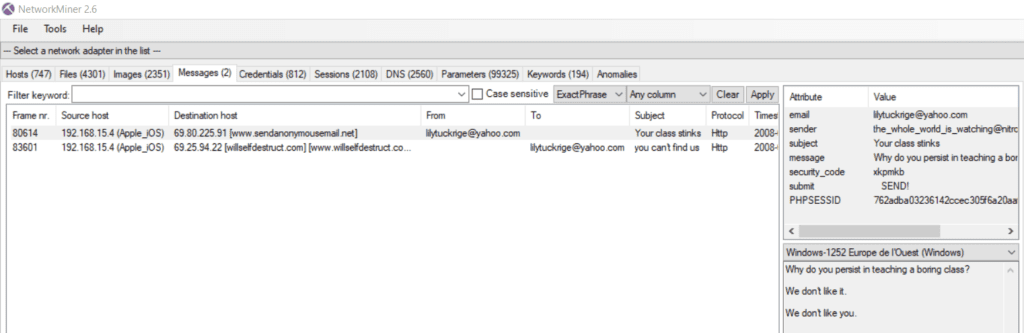
The packet n°80614 shows an harassing message was sent using sendanonymousemail.net
The source IP is 192.168.15.4, and the destination IP is 69.80.225.91
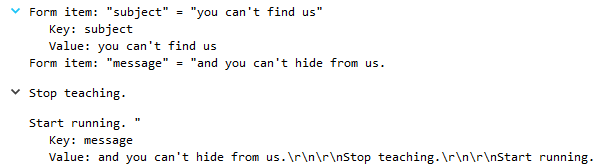
The packet n°83601 shows an harassing message was sent using Willselfdestruct.com, with the exact email header as described in the Powerpoint “you can’t find us”
The source IP is 192.168.15.4, and the destination IP is 69.25.94.22
At this point of the article, we can confirm that the IP 192.168.15.4 plays a central role in the email “attacks” and the harassment faced by the professor Lily Tuckrige
Let’s keep in mind this key information for the next paragraphs
| IP | MAC | Hardware |
| 192.168.15.4 (source) | 00:17:f2:e2:c0:ce | Apple |
Find information in one of those TCP connections that identifies the attacker
So now that we have an interesting IP / MAC pair, that may lead to the identification of the attacker, what could we do next ?
I’ve decided to have a look further in the packets. Could we find maybe, the email adress of the attacker ? And, how to check that ?
I’ve just filtered in Wireshark typing “frame contains mail”. This is a little bit “quick and dirty” but could help to narrow down the research as I had no better idea at this point…then I went scrolling into the selected frames and found some frames titled “GET /mail/ HTTP/1.1 with some interesting content…look at the cookie ! They reveal some email adress and the link to the email platform used !
In the example below, we see the frame n°16744, showing a GET /mail/ HTTP/1.1, the MAC adress in layer 2 of the OSI model, and some cookie informations in clear text :
User-Agent: Mozilla/5.0 (Macintosh; U; PPC Mac OS X Mach-O; en-US; rv:1.8.1.16)
Cookie pair: gmailchat=elishevet@gmail.com/945167
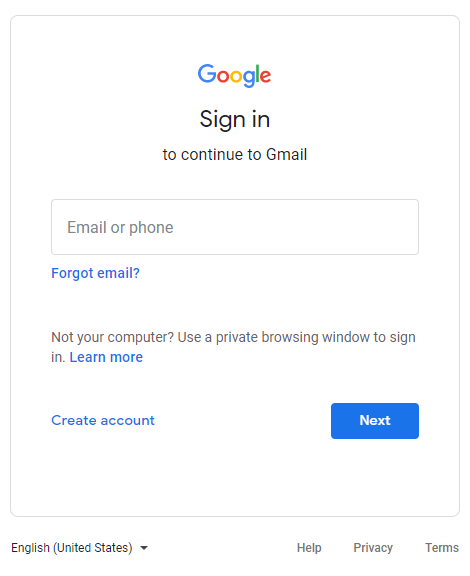
[Full request URI: http://mail.google.com/mail/]

Of course, the http adress points to the Gmail sign in page. When the person is signing in, Gmail downloads the cookie for authentification needs
It’s quite amazing to find this level of information in clear text, furthermore in Wireshark, isn’t it ? Well, not quite. Just read this blog and the summary below -> enforce SSL so the cookie isn’t sent in cleartext !
https://blog.teamtreehouse.com/how-to-create-totally-secure-cookies

Now that we have found a way to identify the email adress of the attacker, let’s go through the different frames including the GET /mail/ HTTP/1.1 info and let’s check the email, IP, MAC data. Probably, we will find a match with the already suspicious IP/MAC pair from the previous paragraph ? Here below the result of my analysis in a table, the match is easily found and highlighted in red
| Frame | IP | MAC | |
| 16744 | elishevet@gmail.com | 192.168.1.64 | 00:1d:d9:2e:4f:61 |
| 78990 | jcoach@gmail.com | 192.168.15.4 | 00:17:f2:e2:c0:ce |
So who dit it ?
Now, we can come to a conclusion, since we have a potential name “jcoach”. Let’s compare with the list of alumni in Lily Tuckrige classroom

We have a match with Johnny Coach ! We found the solution to this harassment case 🙂
NetworkMiner versus Wireshark
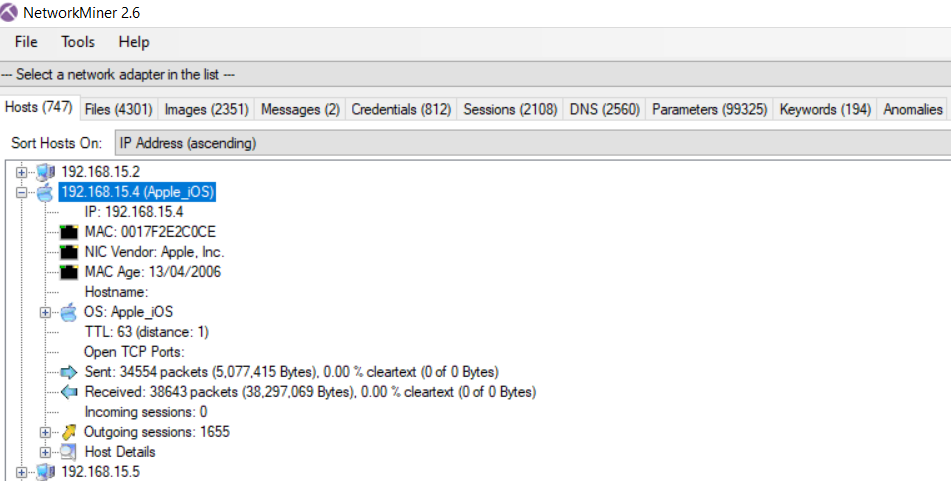
As we solved the case with Wireshark, let’s have a quick look what NetworkMiner could bring. Here a good summary available in Google

I will provide here below a few screenshots of what you can do to solve the case

Conclusion
Doing this exercise, we have discovered some good network packet sniffers, and now could be able to solve more difficult cases
We have seen that with a good packet sniffer, a lot of critical informations could be collected…in such case your personal informations are no longer safe
It was pretty straigthforward to come down to the attacker, thanks to the available email header, then basic filtering in Wireshark and/or NetworkMiner, applying the necessary keywords
Is such a scenario realistic ? Yes, it could be. A network Admin can install such networking sniffers and gather data, or an attacker could slip in a network and also gather informations
To protect yourself, avoid the non encrypted protocols such as HTTP, FTP, TELNET
You can get additional informations about sniffing attacks here : https://www.greycampus.com/blog/information-security/what-is-a-sniffing-attack-and-how-can-you-defend-it
Update 2021/04/30 : please read the chat below, with the user “kinimod” as it shows a deeper complexity to the case !